功能概述
部分用户进行网络安装,不使用PXE,而使用cobbler,该工具来自开源,需要和系统适配。编写cobbler安装配置文档,方便用户在统信服务器操作系统行业版V20 版本上的使用。
使用范围
统信服务器操作系统行业版 V20 -1000c
cobbler工作流程
Server 端
- 启动 cobbler 服务
- 进行 cobbler 错误检查,执行 cobbler check 命令
- 进行配置同步,执行 cobbler sync 命令
- 复制相关启动文件到 TFTP 目录中
- 启动 DHCP 服务,提供地址分配
- DHCP 服务分配 IP 地址
- TFTP 传输启动文件
- Server 端接收安装信息
- Server 端发送 ISO 镜像与 Kickstart 文件
Client 端
- 客户端以 PXE 模式启动
- 客户端获取 IP 地址
- 通过 TFTP 服务器获取启动文件
- 进入 cobbler 安装选择界面
- 根据配置信息准备安装系统
- 加载 Kickstart 文件
- 传输系统安装的其它文件
- 进行安装系统
环境准备
- 测试环境告知,以提供配置时参考:
root 用户登陆状态
网络可以联通
路由器 DHCP 状态:关闭
手动配置 cobbler 配置的服务器端 IP 地址
本机 IP:10.100.20.20
本机设置 DNS:114.114.114.114
本机分配网段及掩码:10.100.20.0 255.255.255.0
网域网关:10.100.20.1
本机 DHCP 设置分配 IP 范围:10.100.20.100 10.100.20.200
- 关闭防火墙、selinux:
[root@test ~]#
systemctl stop firewalld[root@test ~]#
systemctl disable firewalld[root@test ~]#
setenforce 0[root@test ~]#
sed -i 's/^SELINUX=.*/SELINUX=disabled/' /etc/sysconfig/selinux- 注意事项:
1、cobbler 服务、DHCP 服务、TFTP 服务均在服务端上统信服务器操作系统V20 版本上来搭建。
2、在部署前需关闭交换机 DHCP 功能,否则会发生 DHCP 分配 IP 冲突无法连接问题导致部署失败。
3、在部署前需要配置好 yum 源。
4、安装 cobbler 及 dhcp httpd xinetd cobbler-web。
[root@test ~]#
yum -y install cobbler cobbler-web dhcp-server dhcp tftp-server xinetd 注意:arm 架构需要再安装:
yum install -y python3-distro5、启动 cobbler 及 httpd 并加入开机启动。
[root@test ~]#
systemctl start httpd cobblerd[root@test ~]#
systemctl enable httpd cobblerd安装步骤
cobbler 配置
第一次配置 cobbler 时,用命令 cobbler check 检查 cobbler 的配置,如果看不到需要配置的选项,再次重启 cobbler。
[root@test ~]#
cobbler check若看到需要配置的若干选项,即开始进行配置。首先使用以下三条命令,设置可动态修改的配置文件:
sed -ri '/allow_dynamic_settings:/c\allow_dynamic_settings: 1' /etc/cobbler/settingsgrep allow_dynamic_settings /etc/cobbler/settings systemctl restart cobbler设置好可动态修改的配置文件后,参考以下对应的配置命令进行配置:
The following are potential configuration items that you may want to fix:
1 : The 'server' field in /etc/cobbler/settings must be set to something other than
localhost, or kickstarting features will not work. This should be a resolvable
hostname or IP for the boot server as reachable by all machines that will use it.
1.
cobbler setting edit --name=server --value=10.100.20.20
2 : For PXE to be functional, the 'next_server' field in /etc/cobbler/settings must be
set to something other than 127.0.0.1, and should match the IP of the boot server on
the PXE network.
2.
cobbler setting edit --name=next_server --value=10.100.20.20
3 : Please create directory: /tftpboot
3.
mkdir /tftpboot
4 : change 'disable' to 'no' in /etc/xinetd.d/tftp
4.
sed -ri '/disable/c\disable = no' /etc/xinetd.d/tftp
systemctl enable xinetd
systemctl restart xinetd
5 : Some network boot-loaders are missing from /var/lib/cobbler/loaders, you may
run 'cobbler get-loaders' to download them, or, if you only want to handle
x86/x86_64 netbooting, you may ensure that you have installed a *recent* version of
the syslinux package installed and can ignore this message entirely. Files in this
directory, should you want to support all architectures, should include pxelinux.0,
menu.c32, elilo.efi, and yaboot. The 'cobbler get-loaders' command is the easiest
way to resolve these requirements.
5.
cobbler get-loaders
6 : enable and start rsyncd.service with systemctl
6.
systemctl enable rsyncd.service
systemctl start rsyncd.service
7 : debmirror package is not installed, it will be required to manage debian
deployments and repositories
7.
yum -y install debmirror
8 : ksvalidator was not found, install pykickstart
8.
yum -y install pykickstart
9 : The default password used by the sample templates for newly installed machines
(default_password_crypted in /etc/cobbler/settings) is still set to 'cobbler' and
should be changed, try: "openssl passwd -1 -salt 'random-phrase-here'
'your-password-here'" to generate new one
9.
设置 iso 开机 root 密码为 1(根据你的需求自行修改)
openssl passwd -1 -salt `openssl rand -hex 4` '1'
得到字符串,复制整个字符串。
cobbler setting edit --name=default_password_crypted --value='字符串'
10 : fencing tools were not found, and are required to use the (optional) power
management features. install cman or fence-agents to use them
10.
yum -y install fence-agents
[root@test ~]#
cobbler check再次检查后出现
comment out 'dists' on /etc/debmirror.conf for proper debian support
comment out 'arches' on /etc/debmirror.conf for proper debian support
意思是需要注释掉:
@dists="sid";
@arches="i386";
使用以下两条命令进行注释:
sed -i 's/@dists="sid";/#@dists="sid";/' /etc/debmirror.confsed -i 's/@arches="i386";/#@arches="i386";/' /etc/debmirror.conf再次检查
[root@localhost ~]#
cobbler check若出现:
No configuration problems found. All systems go.
即 cobbler 配置成功
DHCP 配置
修改 cobbler 的 dhcp 模块,不要直接修改 dhcp 本身的配置文件,因为 cobbler会覆盖。使用以下两条命令开始配置 DHCP:
[root@test ~]#
cobbler setting edit --name=manage_dhcp --value=1[root@test ~]#
vim /etc/cobbler/dhcp.template...
subnet 10.100.20.0 netmask 255.255.255.0 { #这里改为分配的网段和掩码
#option routers 10.100.20.1; #如果有网关,这里改为网关地
址
#option domain-name-servers 114.114.114.114; #如果有 DNS,这里改为 DNS
地址
option subnet-mask 255.255.255.0; #改为分配的 IP 的掩码
range dynamic-bootp 10.100.20.100 10.100.20.200; #改为分配的 IP
的范围,注意分配 IP 的范围与实际范围
...同步 cobbler 配置:
[root@test ~]#
cobbler syncISO 配置
提供两种 ISO 文件存放方案:
第一种:
说明:对已有的.iso 文件,通过拷贝方式存放 iso
创建存放.iso 镜像文件的文件夹
mkdir /iso将你的.iso 镜像文件,拷贝到/iso 文件内
cp *.iso /iso第二种:
说明:通过挂载.iso 镜像的方式,存放 iso
创建挂载 iso 镜像的文件夹
mkdir /iso将你的光盘介质或 iso 挂载到/iso
mount -t iso9660 /dev/sr0 /iso/存放 iso 文件完成后,对 cobbler 导入 iso 镜像:
cobbler import --path=/iso --name=UOS_Server 填写你安装的系统名称 --arch=填写你的系统架构(aarch64、x86_64)测试环境说明:本机安装系统名称:UOS_Server、架构选择 x86_64
查看导入后镜像:
cobbler distro report --name=UOS_Server-x86_64进入 cobbler 的 kickstart 配置文件夹:
cd /var/lib/cobbler/kickstarts/编辑 kickstart 文件:
vim UOS_Server.ks说明:可随系统名称命名
以下为.ks 文件参考,ks 文件具体化配置根据使用时需求进行修改:
#version=UniontechOS20
# System authorization information
auth --enableshadow --passalgo=sha512
# System bootloader configuration
bootloader --location=mbr --boot-drive=sda
# Partition clearing information
clearpart --all --initlabel
# Use text mode install
#text
graphical
# Firewall configuration
firewall --disabled
# Run the Setup Agent on first boot
firstboot --disable
ignoredisk --only-use=sda
# System keyboard
keyboard --vckeymap=us --xlayouts='us'
# System language
lang zh_CN.UTF-8
# Use network installation
url --url=$tree
# If any cobbler repo definitions were referenced in the kickstart profile, include
them here.
$yum_repo_stanza
# Network information
$SNIPPET('network_config')
# Reboot after installation
reboot
#Root password
rootpw --iscrypted $default_password_crypted
# SELinux configuration
selinux --disabled
# Do not configure the X Window System
skipx
# System timezone
timezone --utc Asia/Shanghai
# Install OS instead of upgrade
install
# Clear the Master Boot Record
zerombr
# Allow anaconda to partition the system as needed
#autopart
part /boot --fstype="xfs" --ondisk=sda --size=500
part swap --fstype="swap" --ondisk=sda --size=2048
part / --fstype="xfs" --ondisk=sda --size=1 --grow
part biosboot --fstype="BIOS Boot" --ondisk=sda --size=2
%pre
$SNIPPET('log_ks_pre')
$SNIPPET('kickstart_start')
$SNIPPET('pre_install_network_config')
# Enable installation monitoring
$SNIPPET('pre_anamon')
%end
%packages
@^minimal-environment
@standard
%end
指定使用新的 kickstart 文件:
cobbler profile edit --name=UOS_Server-x86_64 --kickstart=/var/lib/cobbler/kickstarts/UOS_Server.ks验证本次配置的镜像与 ks 文件配置路径:
cobbler profile report --name=UOS_Server-x86_64 |grep Kickstart开始安装
上述配置好之后,再次同步 cobbler 配置:
cobbler sync显示同步成功,cobbler 服务器端配置完成。
开启同一网段的其他机器:
开机选择网卡启动,跳转到 PXE 界面,选择安装好的镜像即可。
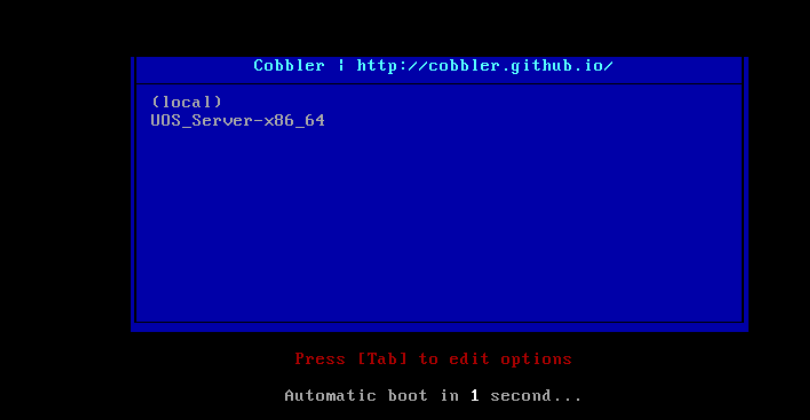
注意:若虚拟机 PXE 安装启动应该选择网卡启动,安装好后选择本地磁盘启动。配置应该提前设置好内存空间,不能低于 2048Mb。若没有跳转到启动界面,日志消息(/var/log/message)显示 DHCPACK 阶段后,则请检查 xinetd 服务是否开启。
©统信软件技术有限公司。访问者可将本网站提供的内容或服务用于个人学习、研究或欣赏,以及其他非商业性或非盈利性用途,但同时应遵守著作权法及其他相关法律的规定,不得侵犯本网站及相关权利人的合法权利。除此以外,将本网站任何内容或服务进行转载,须备注:该文档出自【faq.uniontech.com】统信软件知识分享平台。否则统信软件将追究相关版权责任。